Showing posts with label Cheese. Show all posts

Monday, February 11, 2013

Egg, Pepper, and Cheese Omelet

This is one of my favorite things to eat for either breakfast or lunch (and sometimes dinner if it's leftover night and my family eats all of them or if I've eaten too many calories during the day.)  
I break TWO large eggs directly into a nonstick pan and then use a little fork to scramble them up.  Then I toss in some sweet pepper strips (about a cup of them) and keep the temperature on medium heat.  Also add a little salt and pepper at this point.  
These are the sweet peppers I use.  They are about $2 for a bag and the bag lasts for at least three omelets and I don't have to buy each pepper individually when they are out of season or cut them up.
I use a large spatula to flip my omelet because I don't like any runniness in my omelet. Wait to flip until the edges are all set which usually takes between five and eight minutes.
 When you flip it, the cooked side looks like this.  The second side only takes a minute or two to cook, so don't leave it!
I add a quarter cup of shredded cheddar cheese and fold it in half.  Doesn't that look delicious?  
It's so tasty and good for me with just 283 calories!

2 Large Eggs 140 calories
1 cup C&W Pepper Strips 33 calories
1/4 cup Shredded Mild Cheddar Cheese 110 calories
Let me know if you try this or if there's something you like to add to omelets that maybe I haven't thought of.

Wednesday, January 18, 2012

Homemade Filled Pasta


Tonight I used my new Ravioli maker that Abby gave me for Christmas (obviously it was something I bought for myself-it was filler to get the super saver discount on Amazon...;) to make homemade pasta. It was easier than I expected. I had hardly ever thought about making my own noodles until Halloween when a friend invited a bunch of people to come by her house for homemade chicken noodle soup that was actually homemade! Amazing gal. Then I saw this ravioli maker and a few blogs that I follow posted about homemade pasta and it was done. I was doing it! I had everything except for the semolina flour already in my kitchen and I found that in the bulk section at our local Winco and it's cheap!
Recipe from here. She has a great tutorial on how to make the dough if my directions are confusing. Elizabeth (my almost nine year old) took most of the pictures.

Pasta Ingredients:
1 1/2 cups Flour (and more to roll)
1 1/2 cups Semolina Flour
1/2 teaspoon Salt
4 Large Eggs
1 Tablespoon Olive Oil
2 Tablespoons Water (this was just the right amount, but you may need to add a tiny bit more.)

To mix the dough you can use the counter or a bowl. I chose a big bowl. I mixed the two flours with the salt and then added four eggs. I mixed it all together with my hands until the egg was combined with the dry stuff and then added 1 Tablespoon of Olive Oil and 2 Tablespoons Water and mixed it until it looked like this:
Divide the dough into four sections and cover with a wet smooth towel for 20 minutes. You can make the filling then and put it in the fridge until you need it.
After 20 minutes, roll out one section of pasta dough with your rolling pin (or a pasta roller if you are fancy.) Use a little flour so it doesn't stick to the pin. (I think this picture has a little too much...)
And then roll, baby, roll! Flip the dough over and go both directions until it is thin enough. I like thick pasta (and my wrists were starting to hurt a little. And yes, you can see my poor wintery hands in these pictures. I'm keeping it real.)
I stopped when the pasta was about this thin. Can you tell how thin it is? It's thicker than tissue paper and thinner than cardboard. I hope that helps.
You could slice this pasta up to make regular pasta or continue on to make ravioli.
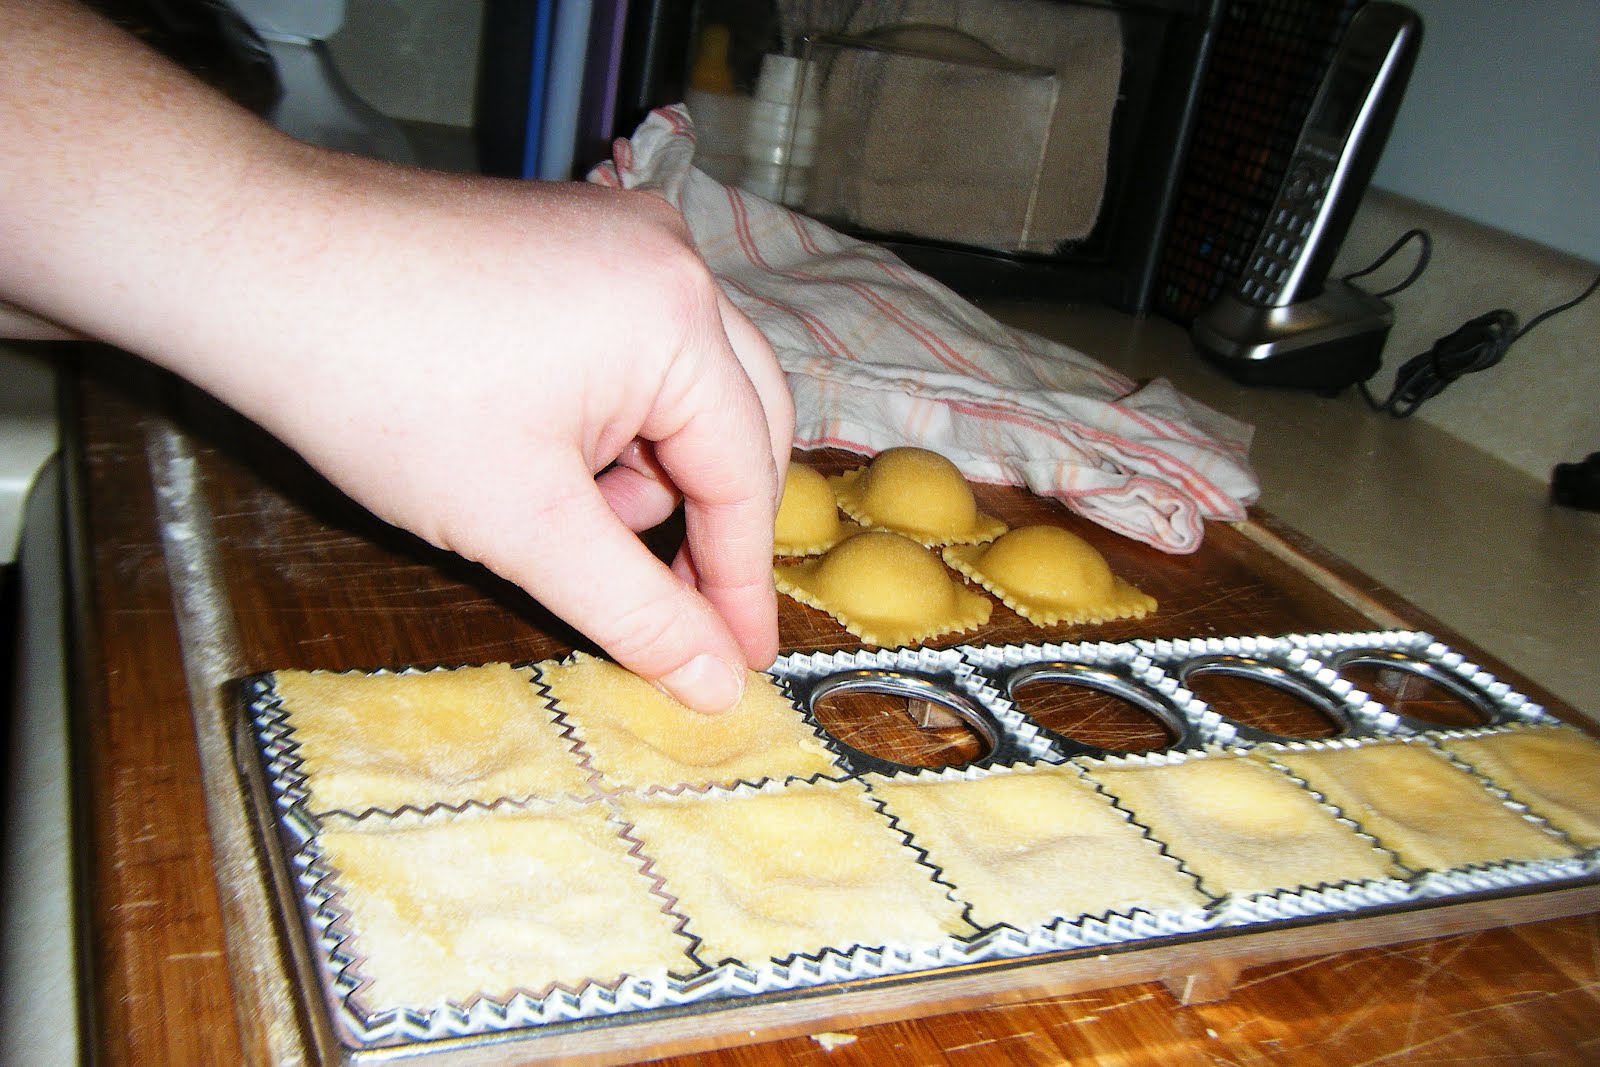
This is where I used the ravioli press. I made my pasta twice as large as the press so I could flip it over when they are filled. You just lay the pasta over it, use the plastic egg carton type thing that came with it that I didn't get a picture of and then the little indents are ready for filling.Here they are all full of the filling. The filling I used was from this site.
Filling ingredients:
1 cup Ricotta Cheese
1/2 cup Parmesan Cheese (I used the real shredded stuff this time and it was great.)
1/2 teaspoon Salt
1/4 teaspoon Pepper
1 teaspoon Italian Seasoning (I added that in.)
Optional: Spinach, shredded carrots, meat, etc.

Here is the pasta all filled up. (If you aren't using the fancy ravioli maker, just spread them out and seal them with a little brush of water around the edges and then cut them apart.)
And then you flip the extra dough over to cover it. I didn't make it quite big enough on the corners here, but I borrowed some extra that was hanging over the top and rolled it into this when it was still on my big cutting board. (Do you see the scraggly edge on the bottom left?)
Then with this ravioli maker, just use your rolling pin to seal the edges and cut the excess. I did have to use my fingers here to divide the dough a little. I think my rolling pin might be getting worn out or warped. I did use the extra dough on the edges to make another ball and put it under the towel with the other balls.
Then carefully peel the edge of the ravioli out of the metal tray and place to the side. They aren't super delicate, but be careful.
I put all 56 raviolis on my cutting boards (still raw) and covered them with a wet towel (just like the dough) until I was ready to cook them. (I needed to wait just a little while until Andy was home from work and with the snow and ice I wasn't sure exactly when that would be.)
When it was time, I put them into boiling water 14 at a time for 4-5 minutes. They sink to the bottom first like this.
And when they are all at the top, scoop them out with a slotted spoon onto plates.
We enjoyed ours with some meaty spaghetti sauce. (Andy's mom made sloppy joe's a few Sundays ago and had extra of the sloppy, so she gave it to me and I mixed it with four little cans of tomato sauce and froze it in two gallon ziplocks.)
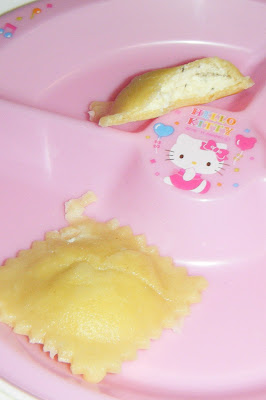
Abby ate her ravioli like this:
I now wonder why and how I ever bought frozen raviolis filled with the stuff it says on the side of the bag for $2-3. These are so easy to make (although a little time-consuming) and worth it! You should have seen and heard how impressed my kids (and husband) were with this dinner!

Wednesday, March 23, 2011

Cheese Muffins

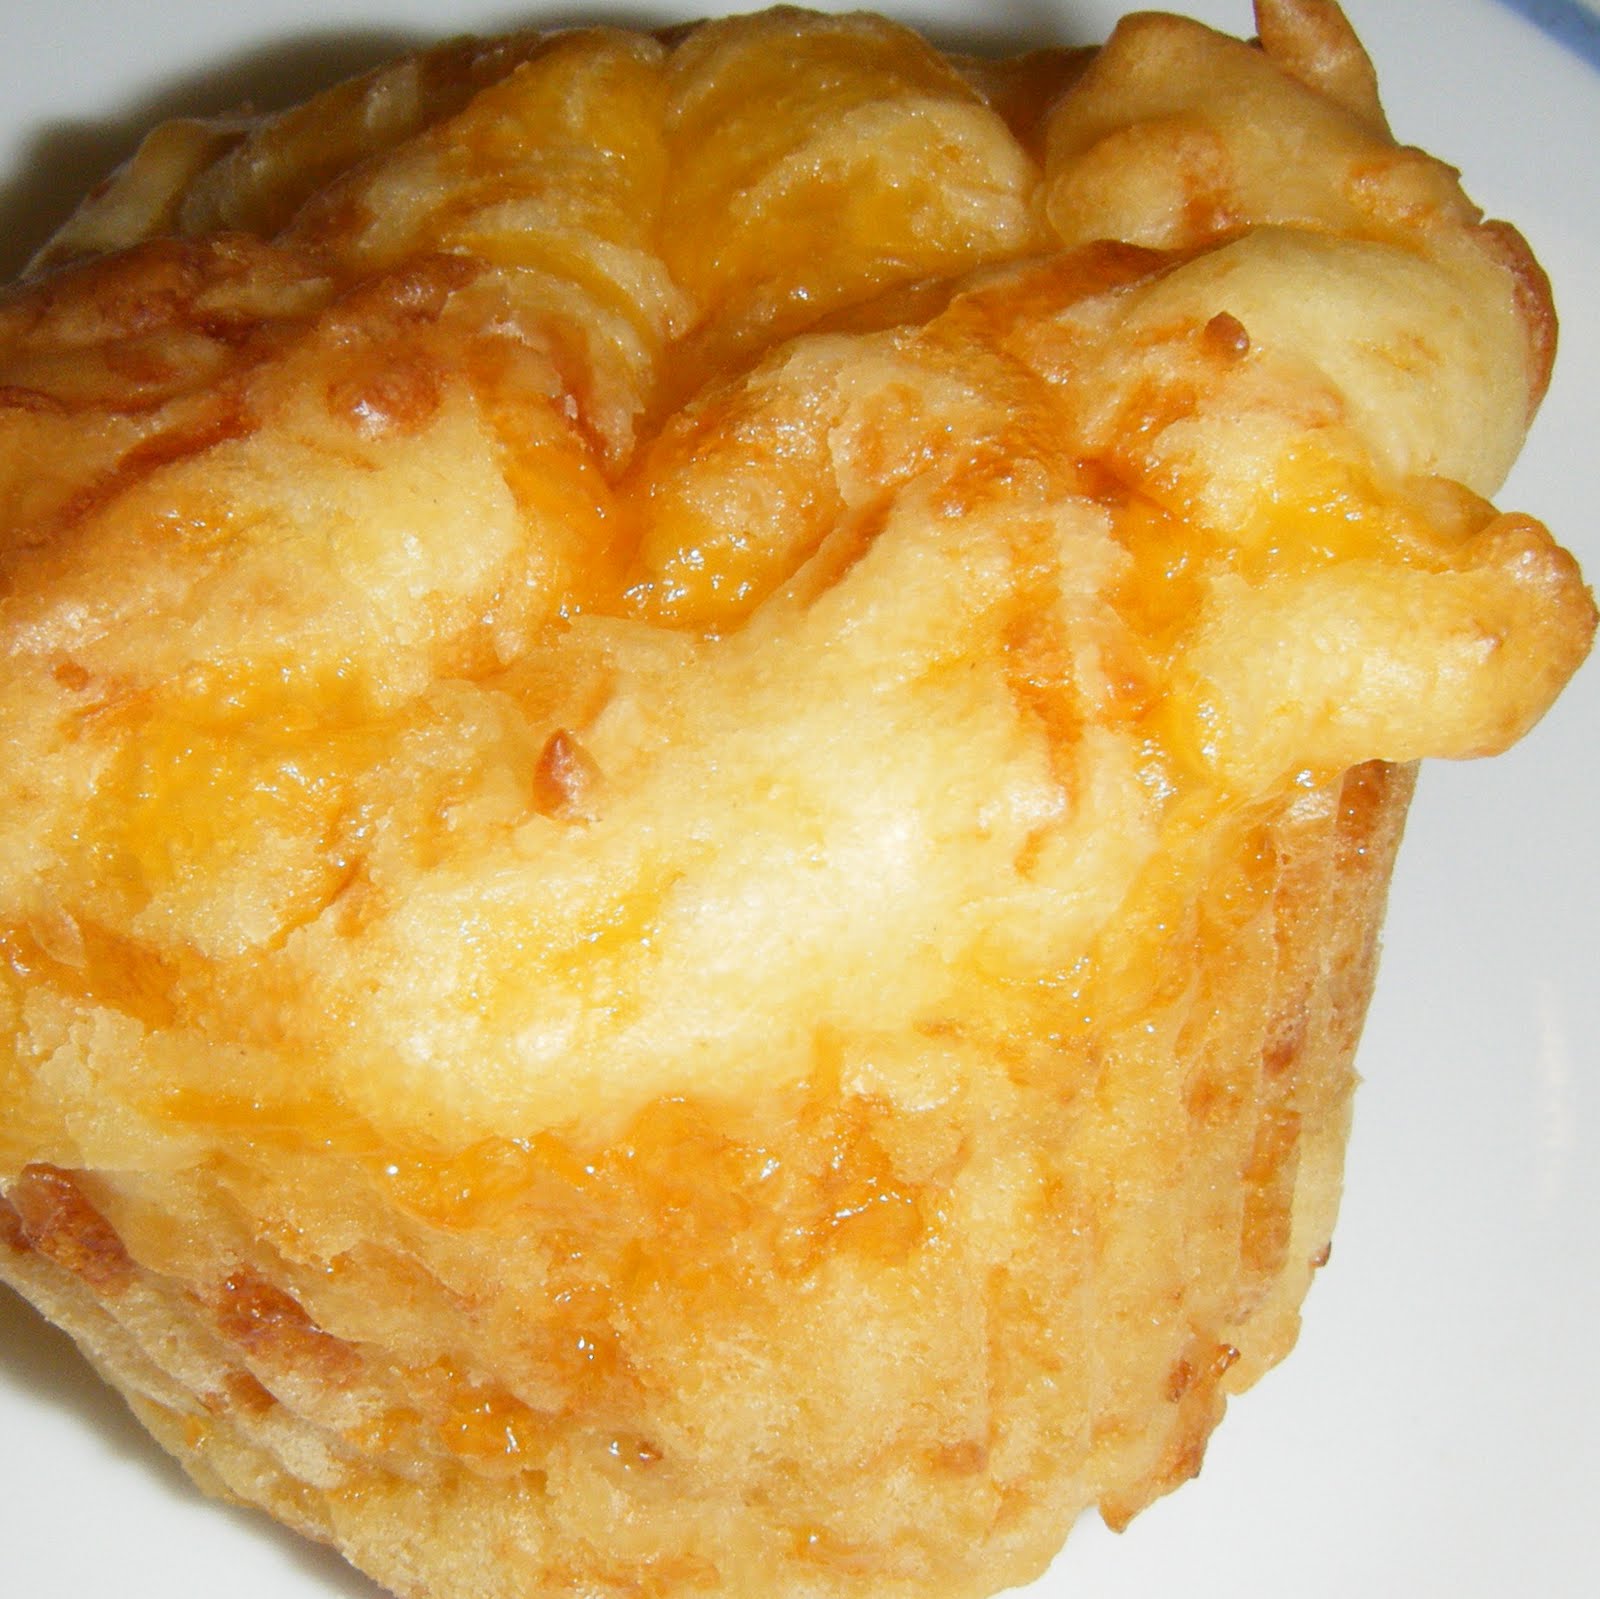
I got this recipe from Addictive Allen's and they got it from Pioneer Woman, so I really should have known that it would be SO good. They whipped up really fast. I had enough time to boil the noodles and heat up the sauce for spaghetti while they baked. I made them last night and just finished the last one (heated up) this afternoon. It only made 12, but somehow we didn't devour every one of them last night. Must have been that yummy spaghetti...

Ingredients:
1 1/2 cups Flour
1 1/2 Tablespoons Sugar
1 Tablespoon Baking Powder
1/2 teaspoon Salt
3 cups Cheese (Any kind works: colby-jack, cheddar, mozzarella, etc)
1 cup Milk
1 Egg
1/4 cup Melted Butter

Instructions:
It doesn't even matter how you put these ingredients together. Just mix and spoon into muffin tins. Yes, it is THREE cups of cheese.
(The official directions are to whisk dry ingredients, stir in cheese(s), then in a separate bowl whisk egg, milk, and melted butter before mixing them into the dry ingredients. )
I just added everything to one bowl and mixed and added the cheese last. They worked beautifully. It will seem as though there is too much cheese, but is there really such a thing as too much cheese????
Bake in greased muffin tins at 375 degrees for 20 minutes.
These muffins are airy and cheesy and delightful! They taste best when the cheese on the inside is melty enough to be a little stringy when you take a bite.
Also, the recipe says it makes 12, but I think it could easily make 15 or so.
Sorry most of my recipes are muffins. I really like them and so do my kids. =)

Tuesday, June 15, 2010

Chicken Sauce

This is for Hawaiian Haystacks (which are rice with chicken gravy and all the toppings you like). You could use cream of chicken soup with milk added to it, but this tastes better, we think. Again I found this on a Mel's Kitchen Cafe Blog I like to read to get great ideas from for delicious food. They were trying to figure out a good way to replace the cream of chicken soup to make it healthier. Personally, I don't really have a problem with cream of chicken soup. I love it, but this was great!
And once again, we ate way too fast to take a picture. If you want to see what it looks like follow the link above.

Chicken Sauce for Hawaiian Haystacks
*Makes about 4 cups chicken sauce (enough to serve 4-6 for Hawaiian Haystacks. I should have doubled this because if I did, I wouldn't have to make dinner tomorrow.)

2 boneless, skinless chicken breasts, cut into bite-size chunks (or leftover cooked chicken, cubed)
3 Tablespoons Butter
½ Onion (about ½ cup), finely chopped (I just used 1 teaspoon or less of onion powder because some people in my household don't like the texture of onions, but do like the flavor.)
3 cloves Garlic, finely minced (I used 1 teaspoon of the crushed garlic that is all ready to use that you buy at the store.)
1 teaspoon Salt
½ teaspoon Pepper
¼ cup Flour
2 cups Milk
1 cup Chicken Broth

In a large skillet (really use a big skillet. I used a small saucepan first and had to switch over.) melt the butter over medium heat and add the onion and raw chicken (if using leftover cooked chicken, don’t add it to the skillet now, you’ll add it later). Saute the onion and chicken, if using, until the onions are soft and translucent and the chicken is cooked through, about 5 to 6 minutes. Add the garlic and cook for about one minute, stirring, until fragrant.

Sprinkle the flour over the onions and chicken and stir to combine. Cook over medium heat for one minute – this helps get rid of the starchy, flour taste. Slowly whisk in the milk and chicken broth. Cook, stirring constantly with a whisk, and bring the sauce to a simmer over medium to medium-high heat. Add the salt and pepper. If you are using leftover cooked chicken, add it now. Continue simmering, stirring the sauce frequently, until the sauce has thickened, about 5 minutes. It took mine a long time to thicken, so I ended up adding a Tablespoon of Cornstarch to help it along for maybe 10 minutes or so instead of 5.

Serve the chicken sauce over rice with your toppings of choice. I asked some friends what they like on their Hawaiian Haystacks and here is what they added to the basics.
Basics: Cheddar Cheese, Green Onions, Sliced Olives, Chow Mien Noodles
Extras: Olives, Tomatoes, Green Onions, Mandarin Oranges, coconut, pineapple, raisins, peas, sliced steamed Carrots, Broccoli or Cauliflower, Sunflower Seeds, Celery, Cut up Boiled Eggs, Bean Sprouts, and someone even said Mustard.

What do you like on yours? I love almost everything, so my plate piles very high!

Wednesday, March 17, 2010

Baked Chimichangas

My husband's cousin passed on this recipe to me last week and I was dying to try it out. We love Mexican food, and especially the kind that is easy to put together, uses ingredients we already have all the time, and is DELICIOUS!This plate includes Spanish Rice and Tortilla chips as well. The chimichanga is under the sour cream, salsa, and cheese in the middle. You can see the gooey goodness on the middle right side.

This recipe makes 6 chimichangas, so if you are feeding a large family, double or triple it.

Ingredients:
1 1/2 cups Cooked Chicken (I boiled three chicken breasts in water with garlic and onion powder and then tore them up after they cooled.)
1/2 cup Salsa (whatever your favorite kind is)
1 cup. Shredded Cheese (I used Cheddar, but I think just about any cheese would be delicious.)
1 teaspoon Cumin (I wouldn't think that missing this one ingredient would matter that much.)
1 teaspoon Garlic Powder
1 teaspoon Onion Powder
1 teaspoon Salt
1/2 teaspoon Black Pepper
1/2 teaspoon Dried Oregano

6 (8 inch) flour tortillas
2 Tablespoons Butter, melted
Salsa, sour cream, cheese, lettuce, etc....for garnishing

Combine chicken, salsa, cheese, and spices in a bowl. (I did this step during naptime so I could pull it out right when my husband got home from work.) Divide mixture evenly among center of tortillas or about 3/4 cup for each tortilla. Fold opposite sides of tortillas over filling, then roll up from the bottom and place, seam side down, onto a baking sheet. Brush with melted butter.

Bake at 400 until golden, approximately 25 minutes. Garnish as you wish.
I would expect these to freeze well, so if you wanted to have an easy freezer meal later, you could make a big batch and then freeze them in a ziplock bag to pull out on one of those exceptionally busy nights when no one eats at the same time and you don't have much time.
Recipes for Black Beans and Spanish Rice to come soon. As soon as I've perfected it.

Friday, January 15, 2010

Fried Ravioli

This recipe came from this blog.
We gave my husband a deep fat fryer for Christmas, so we are trying more than just tater tots now. We do love our tater tots on a weekend evening.

Ingredients:
1 package Cheese Ravioli (WalMart brand has a bag for less than $3)
Marinara Sauce
2 cups Bread Crumbs (I used the Italian Seasoned kind so I didn't have to use the basil and oregano or salt and pepper.)
2 Eggs
1 Tablespoon Dried Basil
1 Tablespoon Dried Oregano
Pinch of Salt and Pepper
Oil for frying

Instructions:
Mix all dry ingredients in a shallow dish (works well with a fork or you can shake them up in a baggie and then put them in a shallow dish, like a pie pan). In another dish beat the eggs with a teaspoon of water. Take the ravioli and put them in the egg, then bread crumbs. Fry them at 375 degrees for about 3 minutes per batch. Put them on a baking sheet in a 250 degree oven until they are all done. Serve with your favorite marinara sauce (heated up) for dipping.

Result: Everyone enjoyed these. Elizabeth even broke her strike with eating spaghetti sauce and said that she liked it to dip in. Next time Andy wants to try making them with meat raviolis.
The best part about using the deep fat fryer to make dinner, is that Andy cleans it up.

Wednesday, January 13, 2010

Pizza Spaghetti

This recipe was from the site Organize and Decorate Everything. The author of that blog is a mother of eight, so the recipe HAS to be good. She said this recipe is their favorite.
Here it is.

Ingredients:

4 ounce package Sliced Pepperoni

1/3 cup Margarine, melted

12 ounces Thin Spaghetti (cooked) I used Penne because I ran out of spaghetti an didn't put it on the list.

4 ounces Grated Swiss Cheese

16 ounces Grated Mozzarella Cheese

2 cans Tomato Sauce- I used Spaghetti Sauce.

1/2 teaspoon Dried Oregano

1/2 teaspoon Dried Basil

Instructions:

Boil pepperoni for a few minutes to remove excess fat.

Pour margarine into a 11×7 baking dish.

Toss cooked spaghetti in margarine. (You could use a small amount of oil instead of the margarine).

Cover spaghetti with one can of tomato sauce. Take it to the edges of the baking dish.

Layer in the order listed:

1/2 of the grated Swiss cheese

1/2 of the pepperoni

1/2 of the mozzarella

Sprinkle with oregano and basil.

Pour on second can of tomato sauce and spread to edges.

Top with the remainder of the Swiss cheese, pepperoni, and mozzarella cheese in that order.

Optional add-ins:

mushrooms, sausage, olives, ground hamburger, peppers, onions

Bake for 25 minutes at 350 degrees.

Result: Everyone enjoyed it a lot! This one will be used again.

Sunday, January 10, 2010

Best Ever Pizza Dough

I went to a cooking class through church last year sometime on cooking pizza, even though I thought I had a pretty good recipe for the pizza dough already, and discovered THE BEST RECIPE for crust there. It is super good and soft and I feel like I can throw it in the air after I roll it out. I don't because I'm afraid I'll drop it on the floor, but I love this recipe!
It makes two twelve inch pizzas or three really really thin pizzas. I have doubled this recipe in my big KitchenAid.

Ingredients:
4 1/2 cups Flour
1/4 cup Vegetable Oil
2 cups Warm Water
2 teaspoons Salt
1 teaspoon Yeast

Instructions:
Measure all ingredients and place in mixer or large bowl. Mix together and knead until smooth. Make sure to incorporate all the flour at the bottom of the mixer/bowl.
Cover and let rise until double. It can take 2 1/2 hours to rise. If you want it to rise more quickly, preheat your oven and place bowl on top of stove to get all the warmth of the oven.
The lady who taught the class swore by the pizza stones and special paddle that you slide the pizza from to the stone. I have a stone and rarely use it because I'd rather have two cheap silver pans that I can cut on and don't care if they get marks on them because they cost $3 each.
I spray my pans with cooking spray and then sprinkle cornmeal (my husband prefers the gritty kind rather than the floury kind) on top of that to make the crust not be mushy in the middle.
Separate dough into two and roll out with flour into a circle. Place pizza dough onto pizza pan with cornmeal. Repeat with second section of dough.

Now you are ready to add pizza sauce (WalMart has a really good brand for $1 a jar), about 1 1/2 cups of mozzarella cheese, toppings of your choice, and another 1/2 cup of mozzarella cheese.
Some options are:
Pepperoni (with Sliced Olives)
Chicken (with BBQ Sauce or Alfredo Sauce and Green Onions and Bacon)
Veggie (with Green and Red Peppers, Olives, Artichokes, Onions, Mushrooms, Tomato, etc.)
Canadian Bacon and Pineapple
All Meat (Sausage, Bacon, Pepperoni, Chicken, etc.)
Cheese (mozzarella)

To make dessert pizza, use same crust.
Add your favorite canned fruit or fruit pie filling and then the following topping.
Dessert Pizza Topping:
4 Tablespoons Butter
1 cup Brown Sugar
1 cup Flour
Mix until crumbly and then spread over fruit filling.

Bake either pizza at 425 degrees for 15 minutes or until melted all the way through and bubbly.

What do you like to eat on your pizza? Our favorite is Pepperoni with olives.

Wednesday, September 9, 2009

Red Sauce Chicken Enchiladas

This is NOT from scratch. At least not the sauce. I use the cans of red enchilada sauce. It is very yummy though and it has made it to Andy's top five meals that I make. He likes everything I make (because I know what he doesn't like and don't add those things).
You could make this ahead of time or even the night before. It throws together fairly quickly. I made mine this morning and then put it in the fridge until we got back from after-school activities. Otherwise, dinnertime would be harder and I'd want to break my goal of only going out to eat once a month. Now dinner's in the oven.

Ingredients:
2-3 Chicken Breasts
1 large or 2 small cans Red Enchilada Sauce (brand doesn't really matter. We actually tried the more expensive one when I had a coupon and liked the WinCo brand Hytop more.)
13-15 Corn Tortillas (works with regular flour tortillas too in a pinch. Guess why I know?)
2 cups Shredded Cheese (Mexican is good. Cheddar works fine)

Instructions:
I just boiled two chicken breasts (with the spices I like-garlic, parsley, red pepper, and chili pepper, use what you like) and cut them up.
Spray 9x13 pan. If you want to, you could pour half a can of sauce in. Heat up 6 tortillas at a time with a paper towel around them, then put some chicken across tortilla with some cheese and roll it up. Place it in a 9x13 pan and repeat until the pan is full. Dump sauce on top and some cheese. Cover with tin foil and let it soak in all the juices from the sauce. You can cook it right away too. Cook for 40 minutes at 350 degrees. If your pan is coming straight from the fridge, you can put it in before the oven is heated.
Either way, this is a great filling meal. The kids like it too. It's so good!
You could serve it with sour cream or guacamole if you want to. We like it just the way it comes out. It also works to tear up the tortillas if you don't have time to fill each one and make an enchilada casserole. Make some Spanish rice to go with it or some corn if you want.

Wednesday, July 22, 2009

Chicken Enchilada Casserole

Chicken Enchilada Casserole
Ingredients:
2 Chicken Breasts
12-18 Corn Tortillas
1 can Red Enchilada Sauce
2 cups Frozen Corn (a drained can of corn would work fine too), Optional
1/2 cup Cheddar Cheese for top

Instructions:
Boil chicken with garlic, red pepper, parsley-or however you like to flavor your chicken. That is the mixture I like. Boil for 20 minutes or until no longer pink. Let soak in the boiled water with lid on for 15 minutes or so. Place chicken breasts on cutting board to cut up into little pieces.
Spray casserole pan or 9X13 pan.
Tear up corn tortillas into dish. Put cut up chicken on top of tortillas. Mix. Add can of enchilada sauce. Mix. Add corn. Mix. Spread cheese on top and bake at 350 degrees for 30 minutes or so.
I made mine at lunchtime and then put it in the fridge until 45 minutes before Andy gets home, so it will have time to cook and time to set up with the lid on while we get ready for dinner. Serve by itself or with Spanish rice.

Monday, March 2, 2009

Upside Down Pizza

I got this at a cooking class in January. I did not make it up.

This is a fast and easy. There is no waiting for dough to rise, rolling out, or slowly placing them all around the pizza pan. Just put it all into the pan and bake.

Ingredients:
Add your favorite pizza toppings. You can add a few or many.
Here are some ideas:
Browned Hamburger
Pepperoni, chopped
Canadian Bacon, chopped
Green Onions
Olives
Sausage
Green Peppers
Pineapple
Sliced Mushrooms (canned or fresh)

1 can Spaghetti Sauce or two cans pizza sauce
2 cups Mozzarella Cheese (or other kind you like)

Topping (Crust):
1 cup Milk
1 cup Flour
1 Tablespoon Oil
2 Eggs
3/4 teaspoon Salt

Instructions:
Spray a 9x13 pan and add the spaghetti or pizza sauce.
Add the pizza toppings you desire.
Top with Mozzarella cheese.
Mix up the crust in a bowl and then pour over the top.
Bake at 350 degrees for about 30 minutes or until the crust starts to brown a little.
About 5 minutes before removing from the oven, sprinkle with Parmesan cheese.
Cut and flip over so crust is on the bottom.

Thursday, January 29, 2009

Corn Bread Taco Bake

One of my old friends said that I'm an amazing cook (and also posted his own recipe for TACO SOUP), so I guess I'd better put something extra yummy on here.

I made this and everyone enjoyed it. The Chili and Ground Beef are on the bottom of a 9x13 pan and then the corn bread goes on top to soak up all the goodness. It's so good. I just wish I could make corn bread like Famous Daves! Now that was some DELICIOUS corn bread!

Corn Bread Taco Bake

Ingredients:
1 pound Lean Ground Beef
1 Envelope Taco Seasoning Mix
1 can Chili
2 cups Cheese, divided (any kind you have or like)
2 Packages (8.5 oz each) Corn Muffin Mix
1 can (11 oz) Mexican-Style Corn, drained
Chopped Tomatoes
Sliced Olives
Sour Cream

Instructions:
Preheat oven to 375°. In large skillet, cook ground beef over medium heat until beef is no longer pink; drain. Add taco seasoning mix and prepare according to package instructions. Stir in chili and 1 cup of the cheese. In large bowl, prepare corn muffin mix according to package instructions. Stir in corn and remaining 1 cup of the cheese. Spoon ground beef mixture evenly onto bottom of 9x13 pan. Top with cornbread mixture spreading evenly to edges of pan. Bake 15-20 minutes or until golden brown. Cut into squares. Top with tomatoes, olives, and sour cream.

Tuesday, January 27, 2009

Easy Cheesy Lasagna

NaDell’s Easy Cheesy Lasagna

Ingredients:
2 cups Ragu or other Spaghetti Sauce
2 cans (10 ¾ oz.) Campbell’s Condensed Cream of Chicken Soup
(may substitute Cream of Celery or Mushroom)
2 ½ cups Shredded Mozzarella Cheese
¼ cup Milk
1 lb. Ground Beef
10 dry lasagna noodles

Instructions:
The best part about this is that you don’t have to cook the noodles before baking.
Mix Chicken Soup, Mozzarella Cheese, and Milk. Set aside. Cook Beef until browned. Pour off fat. Stir in Spaghetti sauce. Heat thorough. Add spices as you wish. Spoon half the Meat Mixture into a 9x13 pan. Top with 5 dry Lasagna Noodles and Chicken Soup Mixture. Top with the remaining 5 Dry Lasagna Noodles and the remaining meat mixture. Add more cheese, olives, etc. if desired. Bake at 400° F covered for 30 minutes, or until it starts to bubble up a little. Let stand 10 minutes to set up. Eat and enjoy!!!

Party Potatoes

Party Potatoes- You could add ham to this.

Ingredients:
8 Medium Potatoes
1/4 cup Melted Margarine
1 can Cream of Chicken Soup
1 1/2 cups Sour Cream
1/2 teaspoon Salt
3 Green Onions, Chopped
2 cups Cheddar Cheese, Grated

Instructions:
Boil the potatoes, peel and cube them and place in large bowl. Add melted margarine to soup. Blend in sour cream, salt, onions, and 1 1/2 cups cheddar cheese. Stir and place in 2 1/2 quart casserole dish. Bake uncovered for 30 minutes at 350° . Top with 1/2 cup more of cheese. Bake 25 minutes more.

Ham Breakfast Casserole

Ham Breakfast Casserole

Ingredients:
6 slices Bread
Butter or Margarine
1 pound Ham
1 ½ cups Shredded Cheese
6 Eggs, Beaten
2 cups Half and Half
1 teaspoon Salt

Instructions:
Remove crusts from bread. Spread with butter. Place in 9x13 pan. Set aside. Spooon ham over bread slices. Sprinkle with cheese. Combine eggs, half and half, and salt. Mix well and pour over cheese. Cover and chill overnight. Remove 15 minutes before baking at 350° for 45 minutes or until set.

Ham and Swiss Cheese Pockets

What to do with Leftovers?
Today, after picking Elizabeth up from school, I was trying to figure out what to make for dinner (since it's one of my goals this year to make healthy frugal dinners).
I came up with Calzone Pockets. I made some dough (couldn't even find the recipe I wanted in my binder, so I made it up) and then shredded up the ham from yesterday, sliced some yummy Swiss cheese and rolled out about 9 parts of dough to make them. I put in some of the shredded ham and broke up the slices of cheese on top and closed them up. 15 minutes later, YUM!

Andy loved them and the girls even ate all of theirs and all of their corn. Vincent had some of the roll part and some corn. I couldn't give up the yummy Swiss cheese. I love that stuff!
What do you do with leftovers?

Cheesy Saucy Manicotti Noodles

Cheesy Saucy Manicotti Noodles - NaDell Ransom
My friend made these for us more than a year ago, but she did it the hard way by boiling the noodles before filling them and didn't put sauce on them.
By spreading sauce on the bottom of the pan and also on top of the noodles, they cook perfectly.
(My picture is extra saucy and they are cut in half to show how they look. )