Showing posts with label Vegetables. Show all posts

Tuesday, April 9, 2013

Microwave Sweet Potato (or Yam)

This is one of my favorite lunches these days.  I was buying sweet potatoes, but they are currently more expensive than yams in the stores I go to, so I bought a few yams to try.  Just as good to me and good for me!
I like to microwave it while I eat a salad or get lunch ready for my two who are at home at lunchtime.
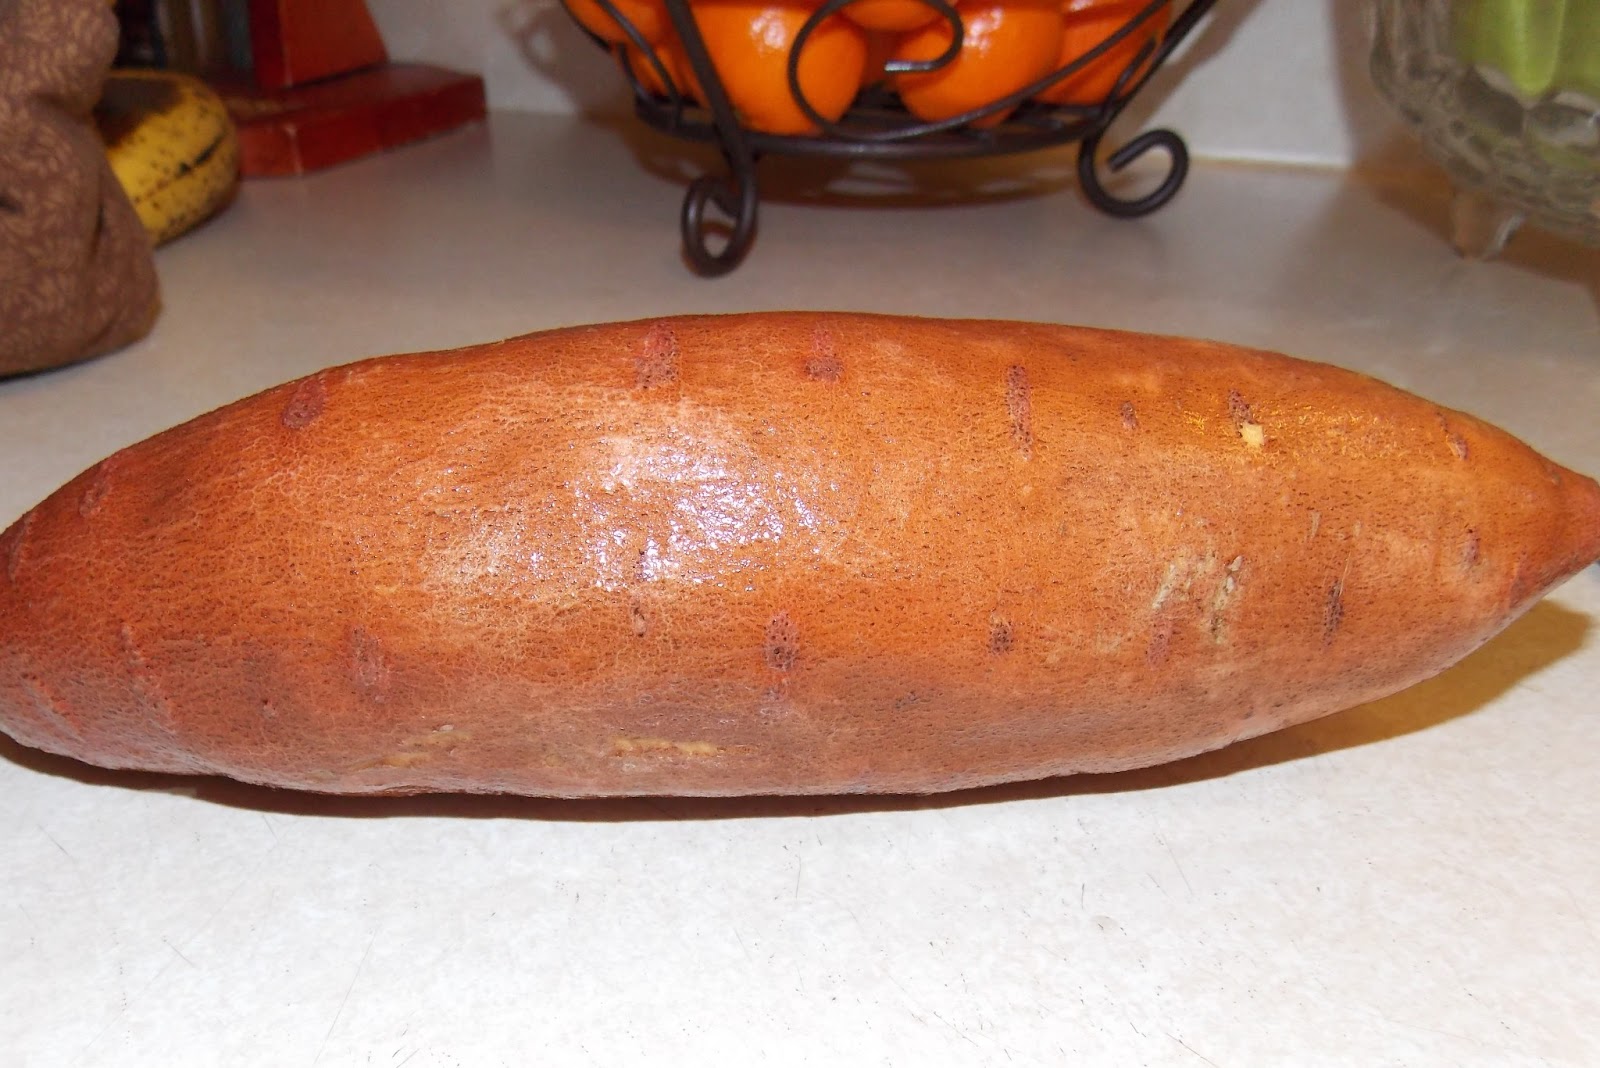
Start with a sweet potato (or yam).  Wash it (I eat the skin....yummy!)

Cut off the ends and cut it in half.  Wrap each half in a paper towel. 


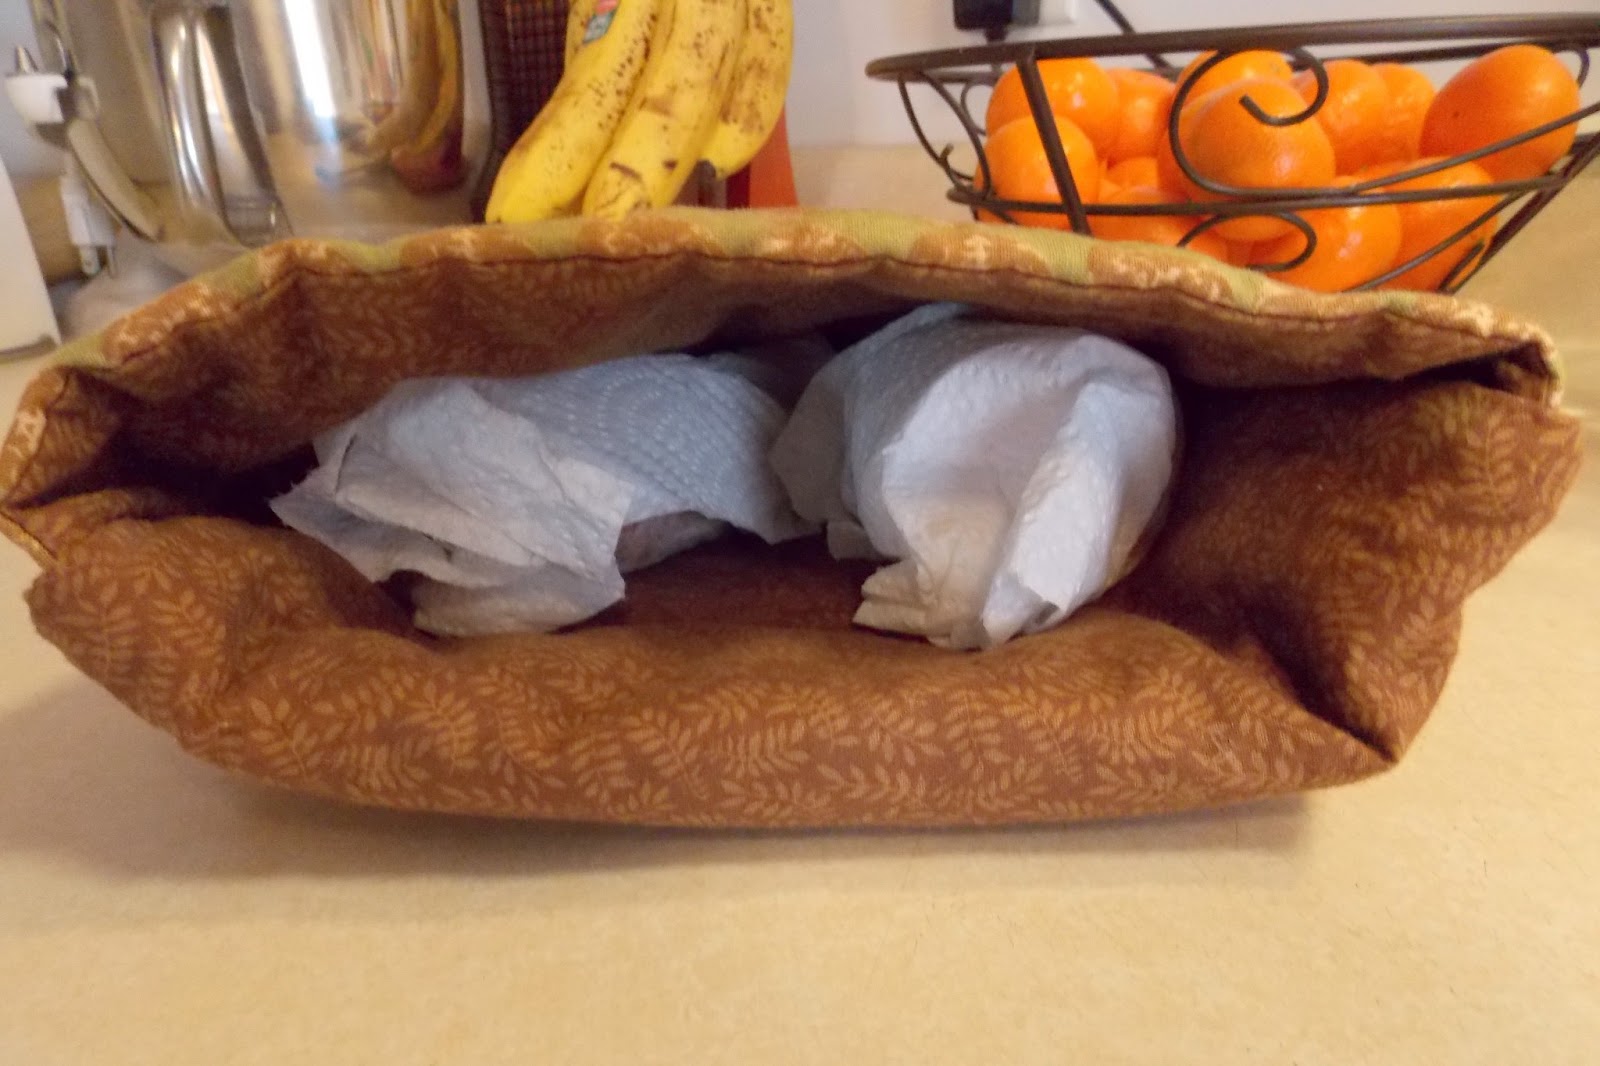
Put it in a really cool microwave potato bag (that I make and sell for just $6).  I heat up tortillas in it to make enchiladas too.)

Close up the potato bag that is made of 100% cotton and it wicks away the moisture so you have a perfectly cooked potato.  Put it in the microwave for five minutes on high.  I usually check to see if it's soft then or let it sit in the microwave for another five to ten minutes resting while it finishes cooking (or cook it for two more minutes).  One other cool thing about these bags is that they keep the food in them hot, so if the kids spill some water or someone calls, I can just let it sit and it will still be great 15 minutes later.

I just slice each half in half again, add a little bit of margarine and salt and pepper and eat it.  

Sometimes I don't even use a fork.  I just tear the halves apart and eat it like a taco.  
As a bonus, they are less than 250 calories, WITH margarine and they fill me up.

What do you eat for a quick lunch? 

Monday, February 11, 2013

Egg, Pepper, and Cheese Omelet

This is one of my favorite things to eat for either breakfast or lunch (and sometimes dinner if it's leftover night and my family eats all of them or if I've eaten too many calories during the day.)  
I break TWO large eggs directly into a nonstick pan and then use a little fork to scramble them up.  Then I toss in some sweet pepper strips (about a cup of them) and keep the temperature on medium heat.  Also add a little salt and pepper at this point.  
These are the sweet peppers I use.  They are about $2 for a bag and the bag lasts for at least three omelets and I don't have to buy each pepper individually when they are out of season or cut them up.
I use a large spatula to flip my omelet because I don't like any runniness in my omelet. Wait to flip until the edges are all set which usually takes between five and eight minutes.
 When you flip it, the cooked side looks like this.  The second side only takes a minute or two to cook, so don't leave it!
I add a quarter cup of shredded cheddar cheese and fold it in half.  Doesn't that look delicious?  
It's so tasty and good for me with just 283 calories!

2 Large Eggs 140 calories
1 cup C&W Pepper Strips 33 calories
1/4 cup Shredded Mild Cheddar Cheese 110 calories
Let me know if you try this or if there's something you like to add to omelets that maybe I haven't thought of.

Wednesday, February 6, 2013

Homemade Chicken Noodle Soup

Has it really been since last June that I posted?!  How can that be?  
Since then I've managed to lose a decent amount of weight, so maybe it was all the treats I made (and ate) to post on this little blog (that and having little to no control!)  If you need a place to start losing weight, I fully recommend My Fitness Pal.  Be my friend on there if you want to.
Back to the recipe.  A friend of mine from church who has nine children (six the regular way and three adopted from China as almost teenagers) showed us how to make these noodles for chicken noodle soup one night at a meeting.  I tried it out a week or two ago, but didn't take pictures.  Today was my oldest daughter's tenth birthday and she requested this for her birthday dinner (told you it was good!) and asked if she could help me make it.  Um, yes you can help make your own dinner on your own day!
Doesn't the finished product look delicious?  Yummy chicken, carrots, and noodles.
I started out with three chicken breasts cut into cubes.
 My daughter helped them cook up in my nonstick soup pan.  She's an awesome helper!
 Elizabeth cutting the carrots with a crinkle cutter.  They were bigger than the ones I normally cut, but they were great and no one chopped off any fingers.
 I threw a handful of white onions in with the chicken so they'd disappear in the soup, but flavor it nicely.
 I put in pepper and a tiny bit of salt and then a lot more pepper.
Before Elizabeth tossed the carrots in the soup, we added two cans of Swanson Fat Free Chicken Broth.  Then we refilled those two cans with hot water and added three chicken bouillon cubes.
We let the carrots cook while we made the pasta.
The pasta dough my friend made just on a cutting board and she said it's easier for her to do it that way instead of using a bowl.  I think next time I'll use a bowl, although it worked well for me last time to just do it this way.  It wasn't easy for Elizabeth and she didn't like getting her hands so messy either.
 
Ingredients for the homemade pasta dough:
1 cup Flour
1 beaten Egg
1/2 teaspoon Salt
2 Tablespoons Milk
Mix these ingredients together until you have a ball of dough.  It will take several minutes (or maybe less if you are awesome! Let me know!)

I started rolling the dough out and Elizabeth quickly took over.  She liked this job.
I made sure it was all thin enough.  You want your pasta rolled thin or it won't cook all the way in the middle.  It does take some muscle to get it thin, but just keep flipping the dough and rolling more until it is spread out a lot.
Elizabeth used my special rolling wavy cutter for the noodles, but a pizza cutter would work just as good or even a sharp knife like my friend uses.  She just stacks the noodles up and cuts them.  We like fancy looking noodles here though because we have a fun tool to use. (Thanks, MOM!)  I know it looks like she's going to chop off her fingers, but I promise that NO blood was shed making this dinner.  It's all the angle.
 Nice little rows of wavy lines of pasta.
We sliced the pasta shorter so they'd cook better, but you could make any kind of noodles you like.
Toss the pasta in the extra flour and make sure they are separated so they'll cook.
Making the noodles looks like it takes a long time and it's hard, but it really isn't.  Give it a try!
Elizabeth was my hand model to drop the noodles in the soup.
Here's what it looked like right after the pasta went in and before it was cooked.  It floats to the top when it's done.
Cook for ten minutes or until noodles are soft and floating.
The flour in the pasta makes the broth whiter and I added 1/4 cup of milk at the end to make it creamy as well.
End product is so good and worth the hour or so of time.
We saved some soup for my mother in law who came over to take Elizabeth birthday shopping and she thought it was great too!
Let me know if you try it and what you add to it.  
Last time I added some finely chopped celery with the onions, but I was out of it today.

Wednesday, March 21, 2012

BEST Asparagus

I finally discovered the BEST way to keep asparagus fresh.  Actually I think I read it somewhere, but I can't find it in my google reader (I searched!) or in the magazines I read last week (without rereading the whole thing...)  Anyway, I FINALLY learned it.
Normally, I buy asparagus because we all (except Andy) really like it.  Then I decide to make it wait a few days and it's yucky and I throw it away.  What a waste!  Friday I bought two bunches of asparagus and put them in my pantry cupboard and later that night I read that the best way to store them to keep them fresh so the ends don't fall apart and they taste good is this:
 If you put it in a cup with water and cover loosely with plastic, it stays fresh.  We ate one bunch Monday night and one on Wednesday and they were still in excellent shape!  I just used a wide cup and filled it with water and then used a fold down sandwich bag to cover it.  I didn't have to refill the water or anything.  I just scooted it back behind the milk.
Here is how I cook asparagus.  It's super easy and delicious.  (I actually learned this from my father in law a year or two ago.)  First you obviously wash it and then cut or snap off the rough ends.
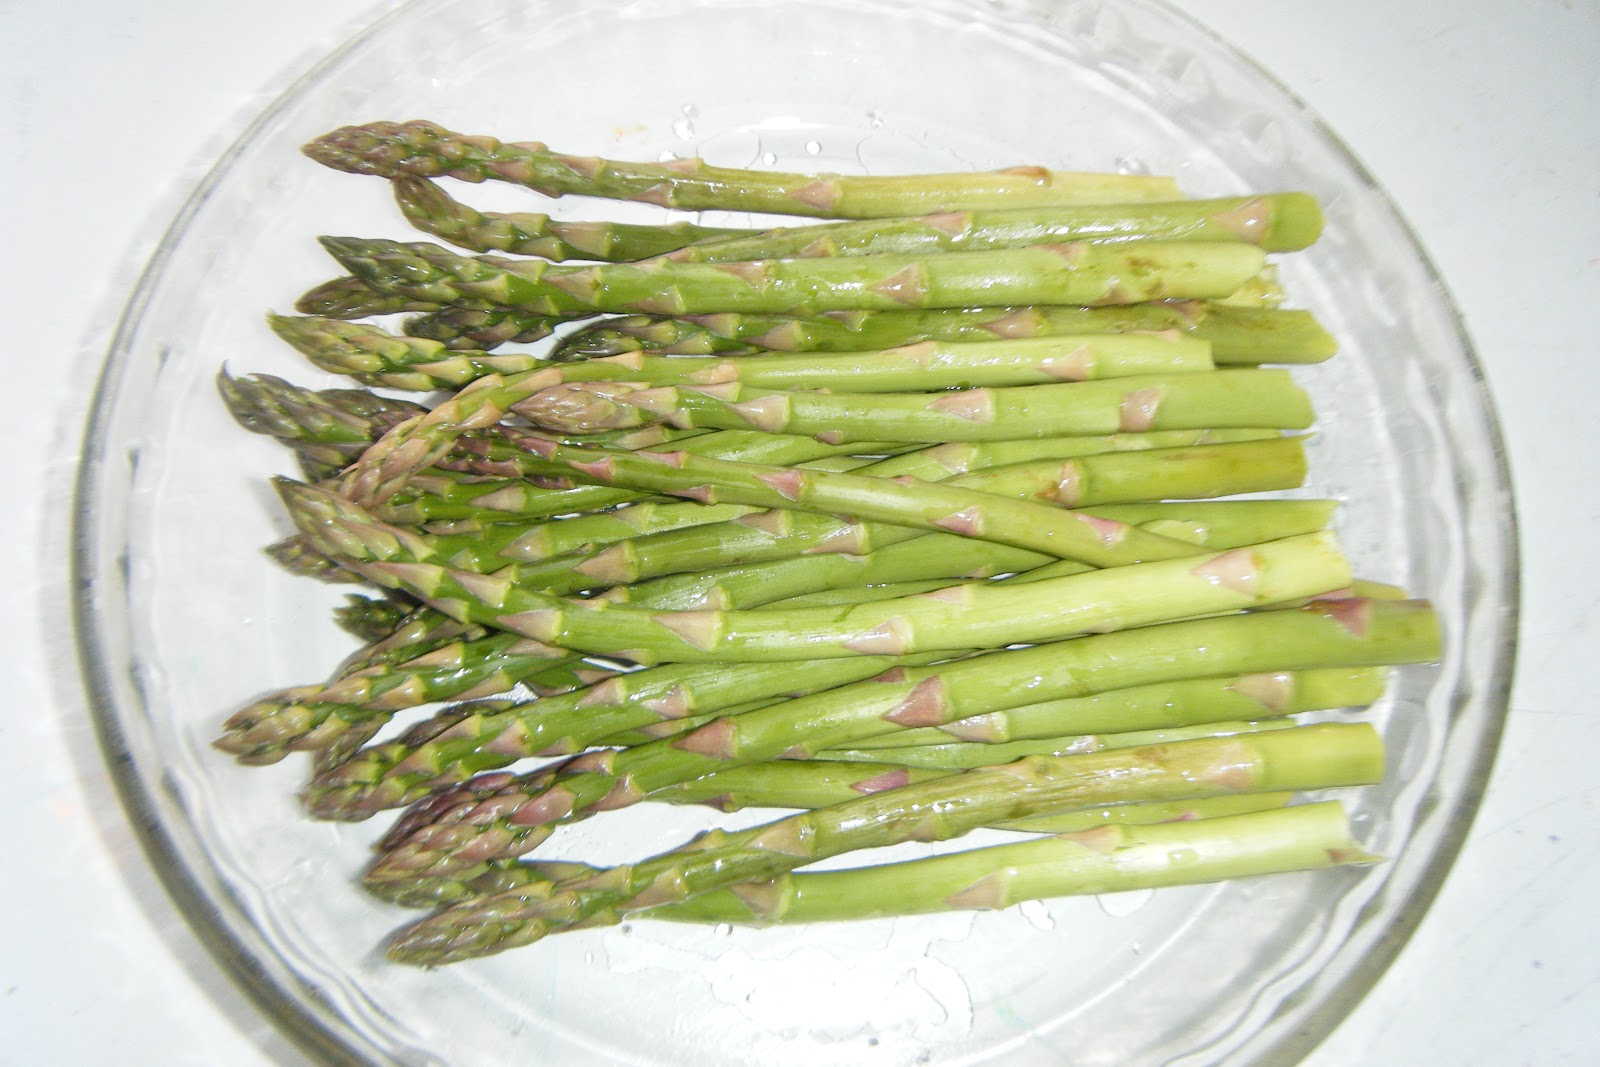
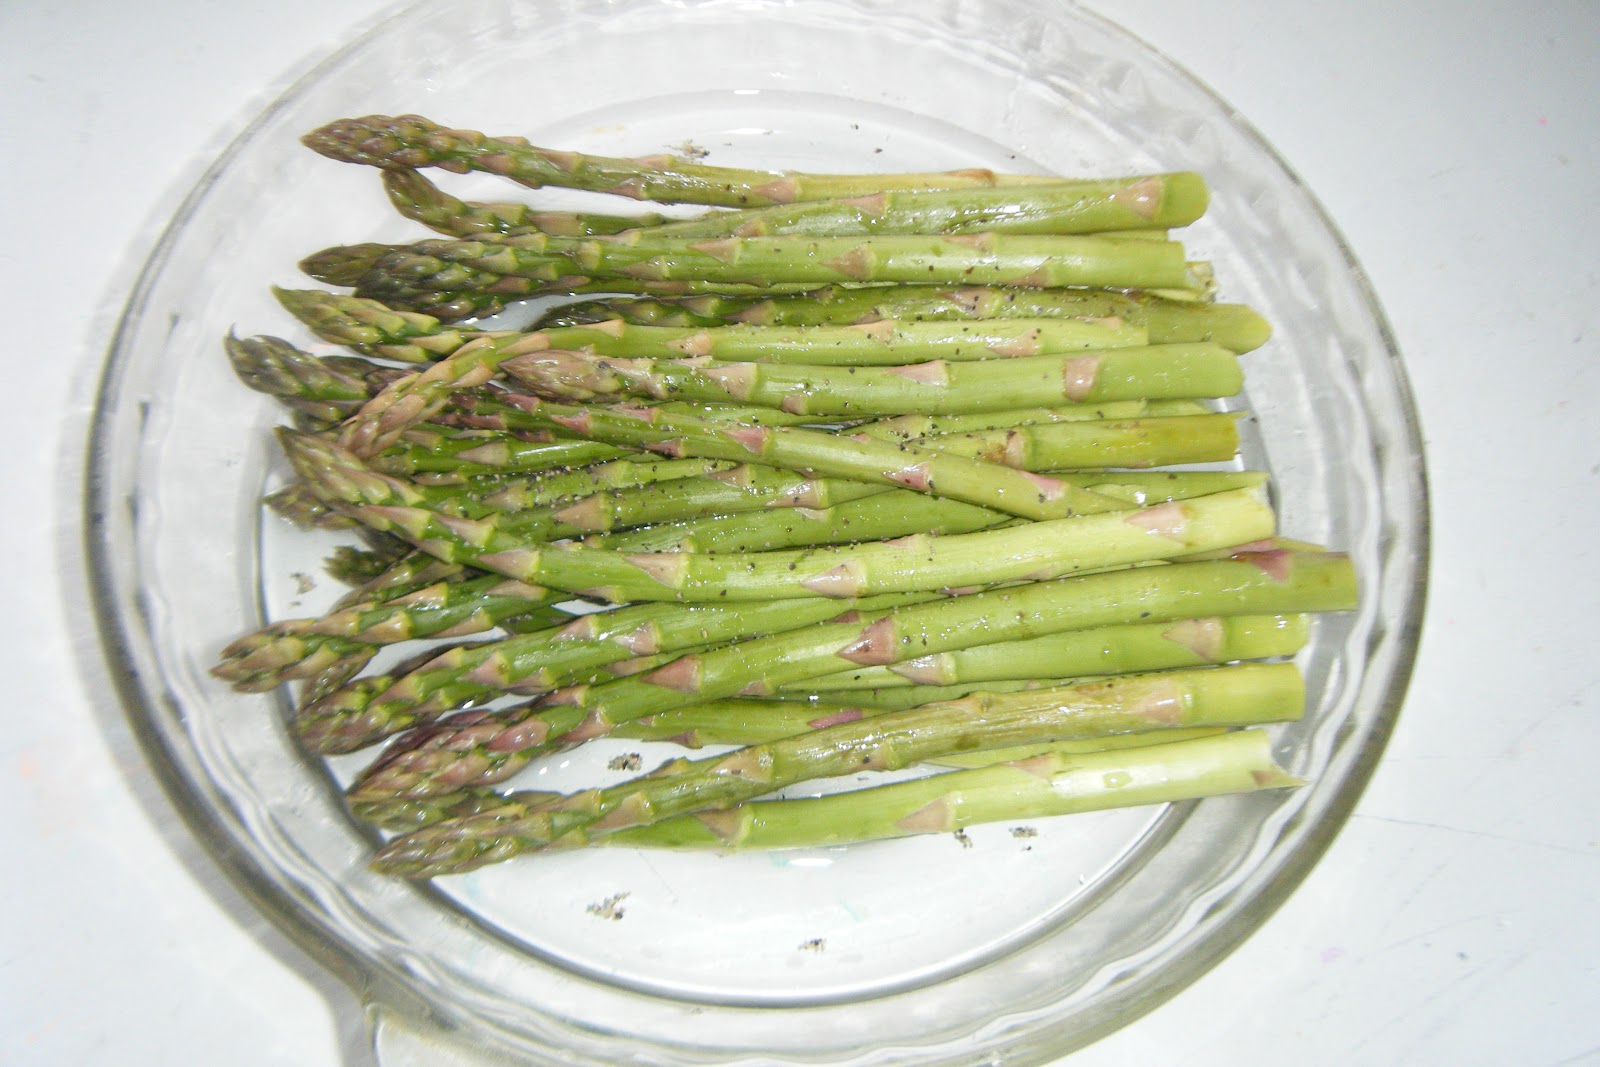
Then I put it in my glass pie plate because it's just the right size for them to lay down in.
 I put about half a cup of water in so the asparagus is mostly steamed and not covered all the way.  Then I shake on the salt and pepper.  A lot of the salt and pepper stays in the bottom of the dish at the end, but it's just enough to season it well.  Here's what it looks like before cooking.
 I put it in the microwave (covered with plastic wrap) for FIVE MINUTES on high and then it's perfect!
 Beautifully steamed and delicious.  ALL of my kids like asparagus just as much as I do.  I hardly ever have leftovers.

I started a little celery plant with the end of the celery in a mug next to my sink.  See the middle there? It's already starting to sprout up a little.  Super exciting!
I'm loving fresh produce right now and can hardly wait until I get to plant my garden (very soon!)

Also, I'm working on losing some weight this year, so I hope to post some healthy recipes and little tips.  I'm walking way more than ever and counting calories and fat and avoiding sugar and junk and all that.  I'm on My Fitness Pal and would love more friends.  My user name is NaDellR.  Any great weight loss tips???

Friday, September 16, 2011

Spicy Squash Saute

This morning I went to a friend's house who had an overabundance of squash and took some off of his hands for him. (My garden is failing miserably, but I planted late and didn't water that much, so it's really my own fault.) I was happy to help him out and I'm excited to share the way I make my zucchini and summer squash (the yellow one) recipe.I use a large, deep frying pan (it's 10 inches at the top, about 5 inches deep and has a lid-I got it at Bed, Bath, and Beyond with a coupon and it was close to $10-well worth it!)
Here's what you need:
*Zucchini
*Summer Squash*Green Onions (or real ones if you'd like and you have them)
*2 Tablespoons EVOO (Extra Virgin Olive Oil-or butter if you like it more)
*Salt and Pepper
*Garlic Powder (or real garlic if you have it)
*Red Pepper Powder
*Italian Seasoning Spice
Instructions:
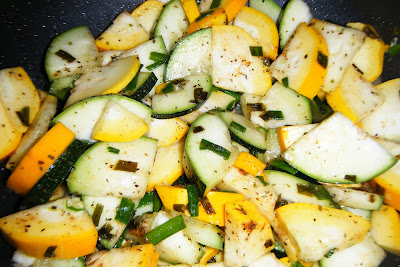
Heat up the EVOO in your pan and add in the green onions (I used my kitchen scissors to cut them). Wash off the squash on the outside before slicing and quartering them. Enjoy the smell of the onions in your pan (I love that smell!) Add in the two different kinds of squash and use a spatula or spoon to cover everything with the EVOO. Add spices-however much you normally like). I added a little too much red pepper this time, but it had great flavor and I liked it, even though it made my eyes water.
Put lid on top and let it steam on low for 10 minutes or so. Just until the squash are a little tender. I waited 15 minutes because I was feeding a cute baby and getting her to sleep and they were still yummy, but a little more mushy than I like.
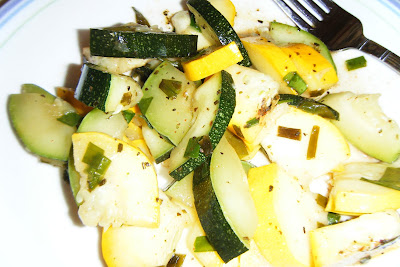
Eat and enjoy.
Look for a few more zucchini recipes soon. I have more to use.

Tuesday, June 15, 2010

Chicken Sauce

This is for Hawaiian Haystacks (which are rice with chicken gravy and all the toppings you like). You could use cream of chicken soup with milk added to it, but this tastes better, we think. Again I found this on a Mel's Kitchen Cafe Blog I like to read to get great ideas from for delicious food. They were trying to figure out a good way to replace the cream of chicken soup to make it healthier. Personally, I don't really have a problem with cream of chicken soup. I love it, but this was great!
And once again, we ate way too fast to take a picture. If you want to see what it looks like follow the link above.

Chicken Sauce for Hawaiian Haystacks
*Makes about 4 cups chicken sauce (enough to serve 4-6 for Hawaiian Haystacks. I should have doubled this because if I did, I wouldn't have to make dinner tomorrow.)

2 boneless, skinless chicken breasts, cut into bite-size chunks (or leftover cooked chicken, cubed)
3 Tablespoons Butter
½ Onion (about ½ cup), finely chopped (I just used 1 teaspoon or less of onion powder because some people in my household don't like the texture of onions, but do like the flavor.)
3 cloves Garlic, finely minced (I used 1 teaspoon of the crushed garlic that is all ready to use that you buy at the store.)
1 teaspoon Salt
½ teaspoon Pepper
¼ cup Flour
2 cups Milk
1 cup Chicken Broth

In a large skillet (really use a big skillet. I used a small saucepan first and had to switch over.) melt the butter over medium heat and add the onion and raw chicken (if using leftover cooked chicken, don’t add it to the skillet now, you’ll add it later). Saute the onion and chicken, if using, until the onions are soft and translucent and the chicken is cooked through, about 5 to 6 minutes. Add the garlic and cook for about one minute, stirring, until fragrant.

Sprinkle the flour over the onions and chicken and stir to combine. Cook over medium heat for one minute – this helps get rid of the starchy, flour taste. Slowly whisk in the milk and chicken broth. Cook, stirring constantly with a whisk, and bring the sauce to a simmer over medium to medium-high heat. Add the salt and pepper. If you are using leftover cooked chicken, add it now. Continue simmering, stirring the sauce frequently, until the sauce has thickened, about 5 minutes. It took mine a long time to thicken, so I ended up adding a Tablespoon of Cornstarch to help it along for maybe 10 minutes or so instead of 5.

Serve the chicken sauce over rice with your toppings of choice. I asked some friends what they like on their Hawaiian Haystacks and here is what they added to the basics.
Basics: Cheddar Cheese, Green Onions, Sliced Olives, Chow Mien Noodles
Extras: Olives, Tomatoes, Green Onions, Mandarin Oranges, coconut, pineapple, raisins, peas, sliced steamed Carrots, Broccoli or Cauliflower, Sunflower Seeds, Celery, Cut up Boiled Eggs, Bean Sprouts, and someone even said Mustard.

What do you like on yours? I love almost everything, so my plate piles very high!

Sunday, January 10, 2010

Best Ever Pizza Dough

I went to a cooking class through church last year sometime on cooking pizza, even though I thought I had a pretty good recipe for the pizza dough already, and discovered THE BEST RECIPE for crust there. It is super good and soft and I feel like I can throw it in the air after I roll it out. I don't because I'm afraid I'll drop it on the floor, but I love this recipe!
It makes two twelve inch pizzas or three really really thin pizzas. I have doubled this recipe in my big KitchenAid.

Ingredients:
4 1/2 cups Flour
1/4 cup Vegetable Oil
2 cups Warm Water
2 teaspoons Salt
1 teaspoon Yeast

Instructions:
Measure all ingredients and place in mixer or large bowl. Mix together and knead until smooth. Make sure to incorporate all the flour at the bottom of the mixer/bowl.
Cover and let rise until double. It can take 2 1/2 hours to rise. If you want it to rise more quickly, preheat your oven and place bowl on top of stove to get all the warmth of the oven.
The lady who taught the class swore by the pizza stones and special paddle that you slide the pizza from to the stone. I have a stone and rarely use it because I'd rather have two cheap silver pans that I can cut on and don't care if they get marks on them because they cost $3 each.
I spray my pans with cooking spray and then sprinkle cornmeal (my husband prefers the gritty kind rather than the floury kind) on top of that to make the crust not be mushy in the middle.
Separate dough into two and roll out with flour into a circle. Place pizza dough onto pizza pan with cornmeal. Repeat with second section of dough.

Now you are ready to add pizza sauce (WalMart has a really good brand for $1 a jar), about 1 1/2 cups of mozzarella cheese, toppings of your choice, and another 1/2 cup of mozzarella cheese.
Some options are:
Pepperoni (with Sliced Olives)
Chicken (with BBQ Sauce or Alfredo Sauce and Green Onions and Bacon)
Veggie (with Green and Red Peppers, Olives, Artichokes, Onions, Mushrooms, Tomato, etc.)
Canadian Bacon and Pineapple
All Meat (Sausage, Bacon, Pepperoni, Chicken, etc.)
Cheese (mozzarella)

To make dessert pizza, use same crust.
Add your favorite canned fruit or fruit pie filling and then the following topping.
Dessert Pizza Topping:
4 Tablespoons Butter
1 cup Brown Sugar
1 cup Flour
Mix until crumbly and then spread over fruit filling.

Bake either pizza at 425 degrees for 15 minutes or until melted all the way through and bubbly.

What do you like to eat on your pizza? Our favorite is Pepperoni with olives.

Wednesday, July 22, 2009

Chicken Enchilada Casserole

Chicken Enchilada Casserole
Ingredients:
2 Chicken Breasts
12-18 Corn Tortillas
1 can Red Enchilada Sauce
2 cups Frozen Corn (a drained can of corn would work fine too), Optional
1/2 cup Cheddar Cheese for top

Instructions:
Boil chicken with garlic, red pepper, parsley-or however you like to flavor your chicken. That is the mixture I like. Boil for 20 minutes or until no longer pink. Let soak in the boiled water with lid on for 15 minutes or so. Place chicken breasts on cutting board to cut up into little pieces.
Spray casserole pan or 9X13 pan.
Tear up corn tortillas into dish. Put cut up chicken on top of tortillas. Mix. Add can of enchilada sauce. Mix. Add corn. Mix. Spread cheese on top and bake at 350 degrees for 30 minutes or so.
I made mine at lunchtime and then put it in the fridge until 45 minutes before Andy gets home, so it will have time to cook and time to set up with the lid on while we get ready for dinner. Serve by itself or with Spanish rice.

Thursday, May 14, 2009

Cafe Rio Salad

My friend made this awesome salad (really a main dish) for a baby shower/dinner. It was SO good that I had to request the recipe to share. Most of you have had this before, since I've heard a lot of talk about Cafe Rio, but here is the recipe for the meat, the pico de gallo, and the dressing.


*Total Prep-Time: 18 hours, technically. But most of that is just waiting for the pork to cook. I’d say active cook time for the entire meal was perhaps an hour, maybe 1 hour 15 mins. Lots of this meal (dressing, pico) can be made before-hand and kept in the fridge until it’s time to eat.
* Was the recipe easy to follow: Extremely easy. It’s mostly chop, dump and marinate. Easy-peasy.
* Are the ingredients easy to find: It took me a bit of searching in the Mexican Food section to find Chipotle Chilies in Adobo Sauce, and also a bit of googling to figure out what, exactly, a tomatillo looked like. But I found everything at my grocery store.
* Do you need special equipment: Large-ish crock pot and a blender. A food processor would make quick work of the pico, although I chopped mine by hand.
* Does the end result taste delicious: YES! Yes, yes, yes, yes, yes. This was the best meal I have ever made, hands down, no questions. And there were enough leftovers for my neighbors, and my roommate, and a couple of meals for me. This makes a ton of food, but it will be eaten quickly. Try it, taste it, and you’ll understand why.

Cafe Rio Pork Barbacoa


5-6 lb. pork roast

21 oz. Dr. Pepper (or Coke, do NOT use diet soda)
1 cup brown sugar
3/4 cup white sugar
1 clove garlic, minced
7 oz. can chipotle chilies in adobo sauce
6-ish oz. red taco sauce (I used hot)
1 tsp dry mustard
1 tsp cumin
1/4 tsp cayenne pepper

Place roast in crock-pot, cover half-way with water and cook on low for 12 hours. (I started my Pork Adventure at midnight and everything worked out perfectly for Sunday dinner at 6:00 pm.) After 12 hours, drain pork (retain liquid if you want sauce for burritos, simply mix with a can of verde enchilada sauce and away you go).

Mix remaining ingredients until sugar dissolves. I didn’t keep the actual chilies, I dumped the can into a bowl and added enough Dr. Pepper to get all the sauce off of the chilies, then I tossed them. I also rinsed out the can with Dr. Pepper for more adobo goodness. My version had a fairly good kick to it, but if you LOVE hotness, then blend everything + 2 or 3 chilies in the blender. (Also, the adobo sauce tends to stain plastic, using a glass or metal mixing bowl will make your clean-up of adobo sauce considerably less frustrating).

Add Dr. Pepper mixture to the roast and cook on low an additional 4 hours.

Take out roast and shred, add back into sauce and cook for 2 more hours. At this point the meat was so tender it practically shredded itself.
OR CHICKEN
Café Rio Salad
Chicken:
1 bottle (16. oz) Kraft Zesty Italian dressing
1 Tbsp. chili powder
1 Tbsp. cumin
3 cloves garlic, minced
5 lbs. chicken breasts
Mix ingredients and pour over chicken breasts in a crockpot. Cook on low for 4 hours. Shred
the chicken and cook 1 more hour to soak up the juices. Serve with a slotted spoon.

***** ***** ***** ***** *****
Easy Pico-de-Gallo


3 tomatoes, diced
1/2 bunch of cilantro, minced
1/2 sweet onion, minced
1 section of green pepper, minced
3-4 cloves garlic, minced
about 1/3-1/2 cup vinegar (use your best judgement)
salt and pepper

Mix it up really well and refrigerate. I put my pico in a Tupperware and shook it up really well right before serving to re-mix.


Dressing:


2 tomatillos, peeled and chopped
½ bunch cilantro
1 garlic clove
1 lime, juiced
1 jalepeño , limit seeds to reduce how “spicy” you want it
1 8-oz. pkg buttermilk ranch dressing (regular ranch works too)
Blend in food processor: tomatillos, cilantro, garlic, lime and jalapeno. Make dressing according
to the directions on the package (but use less milk than requested). Then add the blended
ingredients and chill. The longer it sits the better.

Rice:
4 cups water
4 tsp. chicken boullion
4 tsp. garlic, minced
½ bunch cilantro, chopped
1 can green chilis, undrained
¾ tsp. salt
1 Tbsp. butter
½ onion, chopped
2 cups rice
While bringing water to a boil, combine in a food processor: cilantro, green chilis & onion. Add
all ingredients to boiling water. Cover and cook for 20 min at a simmer.


Layer:
-tortilla sprinkled with cheese (slightly crisp in a frying pan)
-rice
-shredded chicken
-black beans, rinsed and drained
-romaine lettuce, chopped
-tomatoes, chopped
-avocado, chopped
-dressing
-fresh lime squeezed over top, quartered
-top with Fiesta tortilla strips (optional)
***** ***** ***** ***** *****

Now, invite some people over and get cooking!